Chintoo
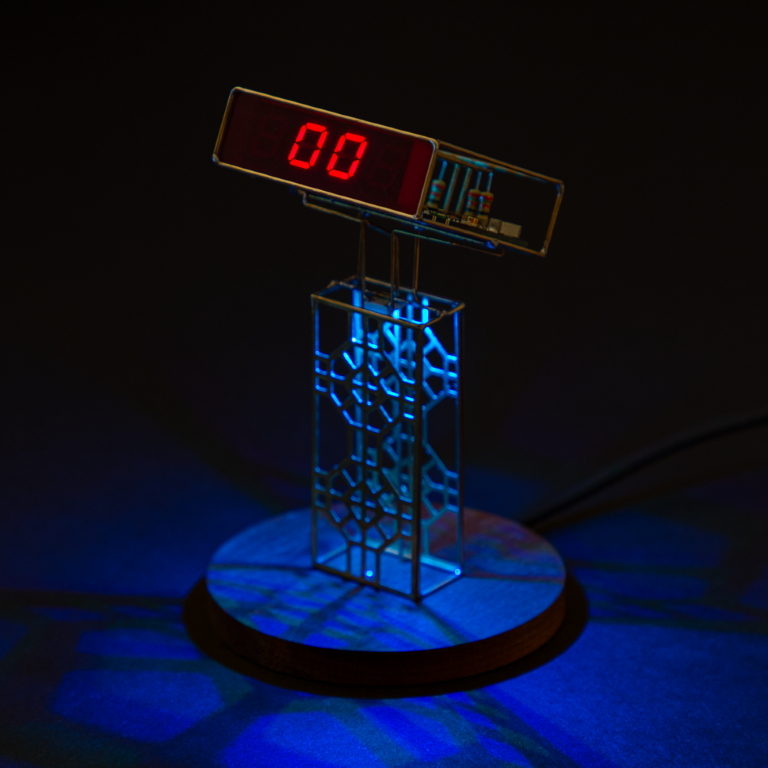
Chintoo is a simple internet-connected seven-segment display that fetches time, weather, and custom notifications over Wi-Fi. It’s powered by a Particle Photon, uses a four-digit seven-segment display module, an RGB LED, and runs off USB power.
I love combining the Particle Photon with seven-segment displays in my circuit sculpture projects. After making a few with brass rod frames, I wanted to experiment with a version that used a milled brass frame for the body instead. This project is similar to Seven Seg Boxy, but instead of measuring local temperature, it fetches today’s forecasted temperature and displays it on the seven-segment display.
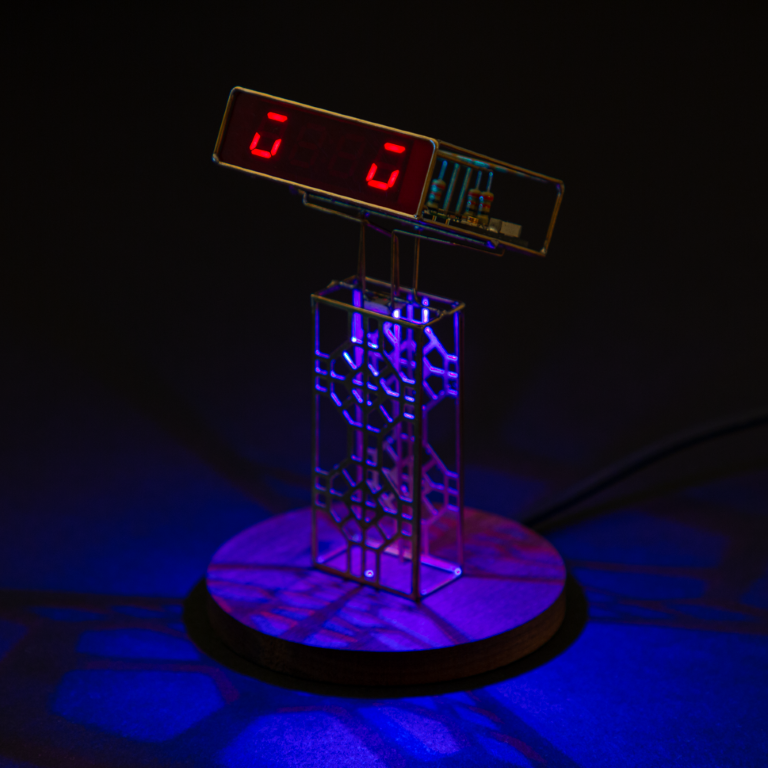
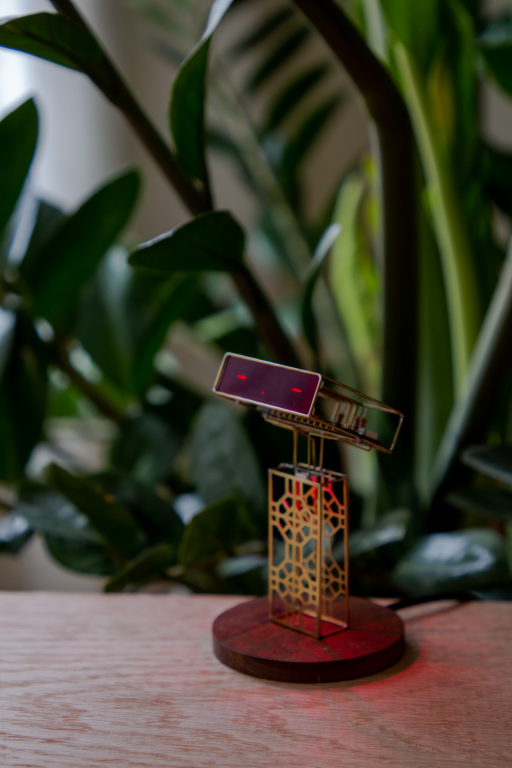
It’s fascinating how much emotion can be expressed through these simple display modules.
Chintoo is a common nickname in Marathi, often used for a curious or playful child. I chose it for this sculpture because it captures the same spirit — a small, lively device that’s always fetching updates and sharing bits of information with character.
Parts List
- Particle Photon (now retired). You could use any of your favorite dev board instead.
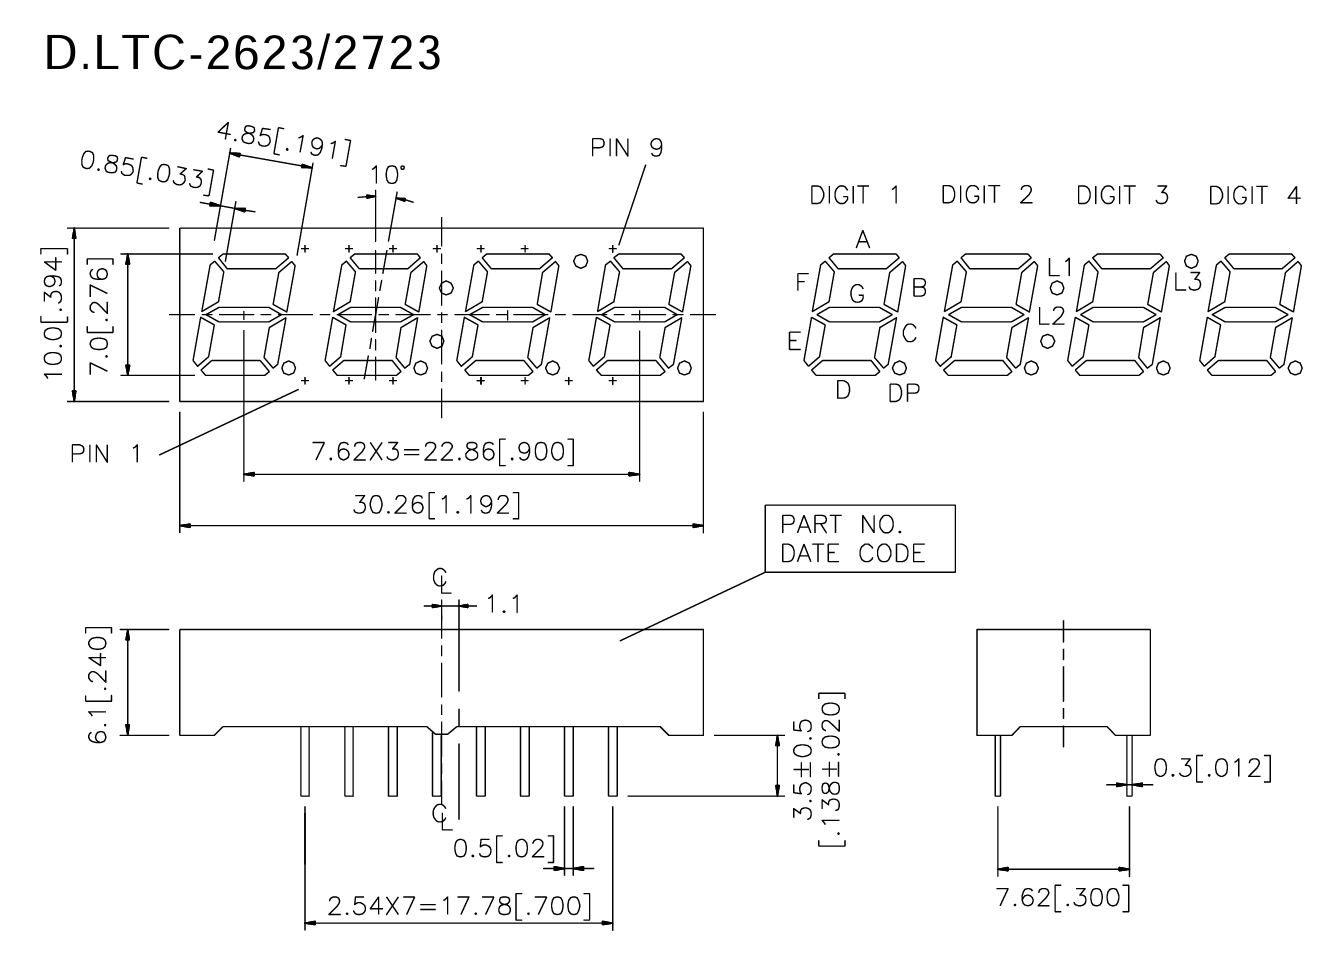
- 4-digit seven segment display module LTC-2723P (obsolete but you can still buy them )
- WS2812B RGB LED. You can buy individual LEDs or get them pre-soldered on a breakout PCB like this.
- 20 AWG brass or copper rods
- Plastic diffuser sheet. I have had good luck with this product.
Tools
- Soldering Iron. Any good soldering iron above 60W will work. I recently started using Pinecil, and have been enjoying using it a lot. The Hakko FX888D is a solid choice as well, or a Weller.
- Solder. I have not had good luck with lead-free solder.
- Flux. I use this flux pen which is very convenient to dispense.
- Flat needle nose pliers. These flat ones are awesome, while these thin ones are good for tighter bends.
- Flush cutter. I like this one from Xuron.
- Steel wool to clean the joints.
- Printer for printing templates.
- Desktop CNC if you wanted to mill brass.
Controller
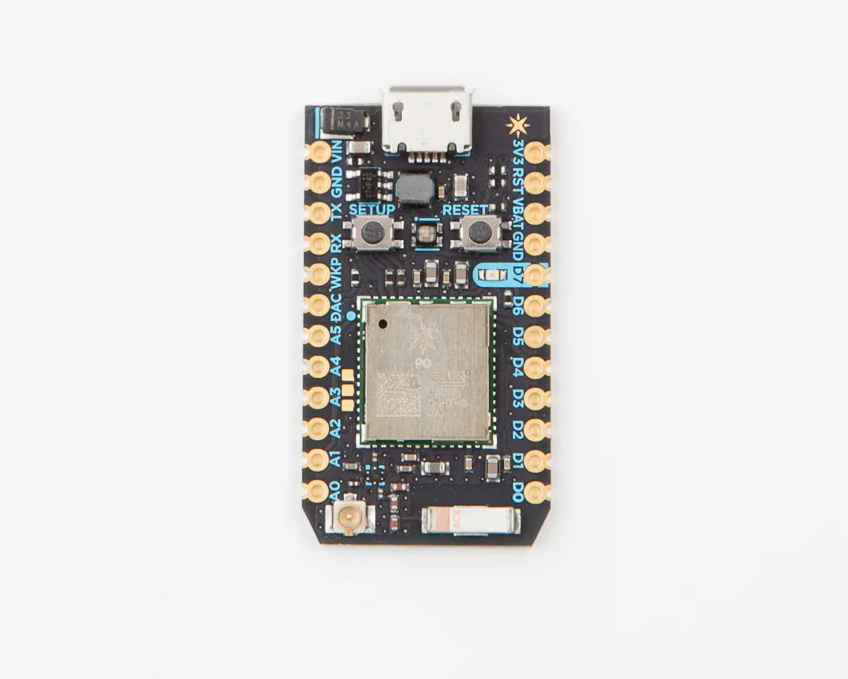
The Particle Photon was a compact Wi-Fi development board powered by an STM32 microcontroller and Broadcom Wi-Fi chip. It made it incredibly easy to prototype connected projects thanks to seamless integration with the Particle Cloud for setup, firmware updates, and OTA control.
Though now discontinued, the Photon remains one of my favorite boards — simple, reliable, and way ahead of its time. It’s what got many of us hooked on building connected devices.
Display
I bought a dozen of these four digit seven segment display at a flea market. This particular model is not obsolete but you can still find them online or you can substitute it with an equivalent.
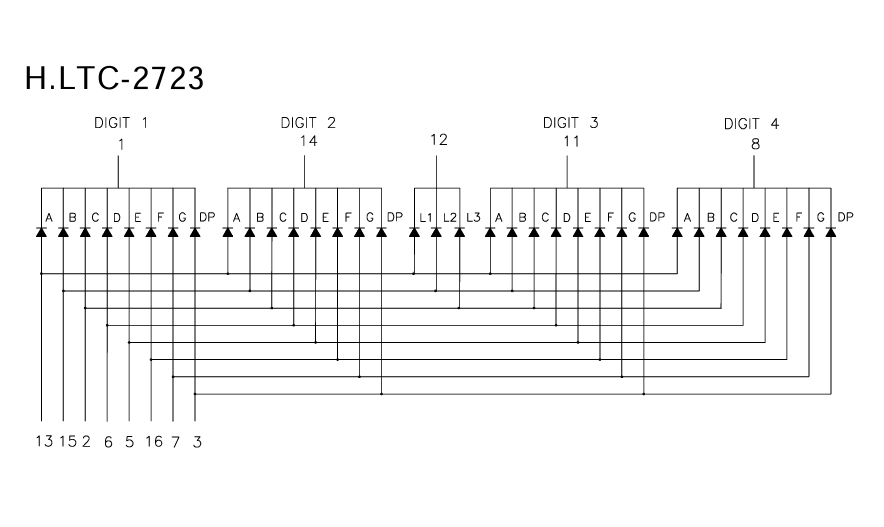
It is a red colored common cathode 4-digit seven segment display module made by Lite-On.

Pin Map
Pin Function
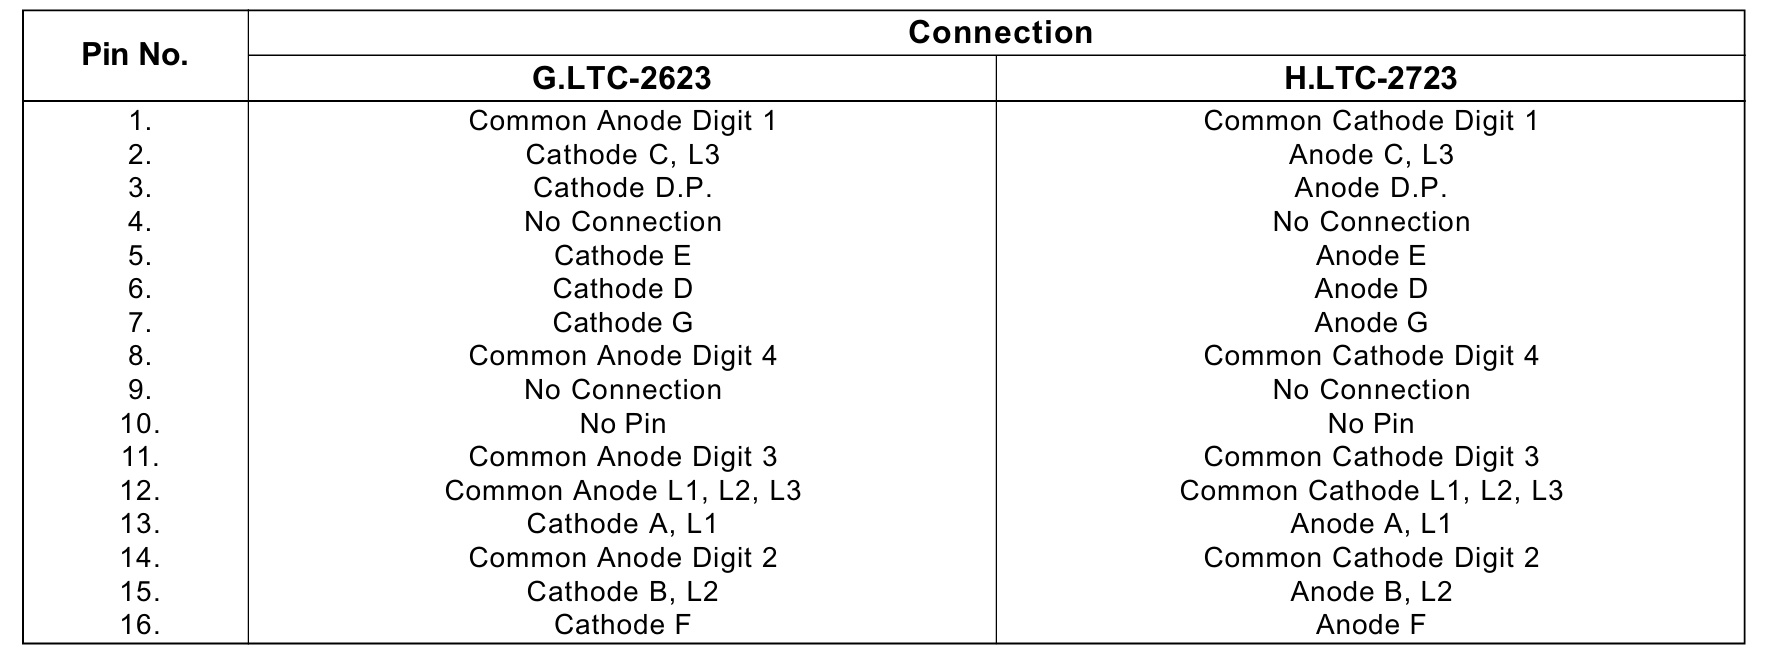
Pinout
Connections
| Display Connection | Photon Pin |
|---|---|
| Digit 1 | TX |
| Digit 2 | D7 |
| Digit 3 | D4 |
| Digit 4 | A2 |
| Segment A | D6 |
| Segment B | D3 |
| Segment C | RX |
| Segment D | A4 |
| Segment E | A5 |
| Segment F | D2 |
| Segment G | A3 |
| Decimal Point (DP) | WKP |
| WS2812B data in | D0 |
33 ohm series resistor are connected to each segment pins.
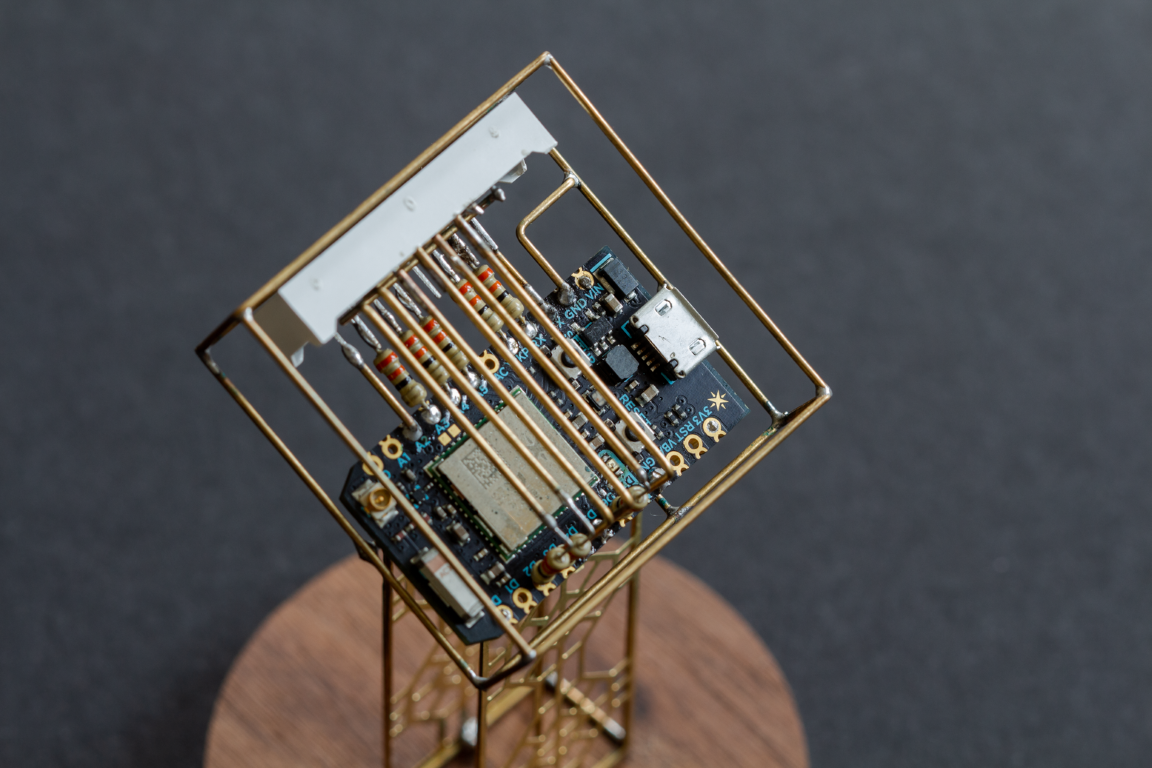
Construction
The construction is similar to the previous projects that used a combination of the Photon and the LTC2723 seven segment display module. I did not take any photos during the construction of the project.
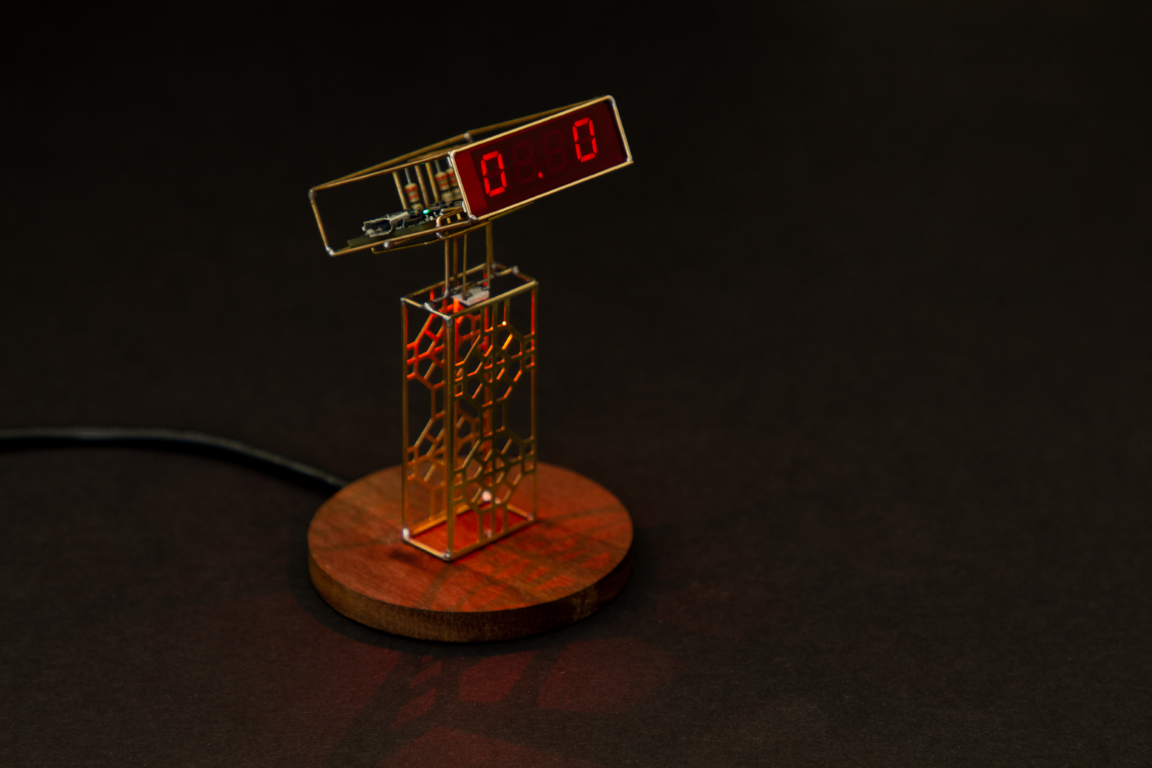
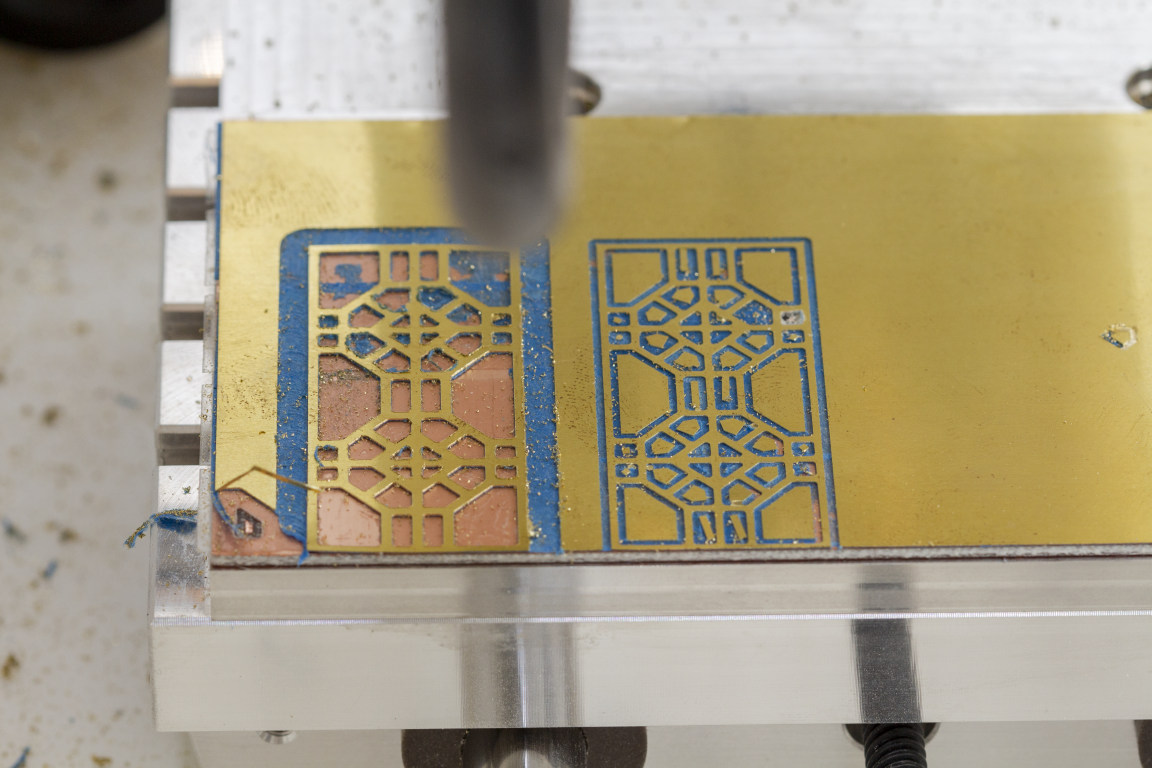
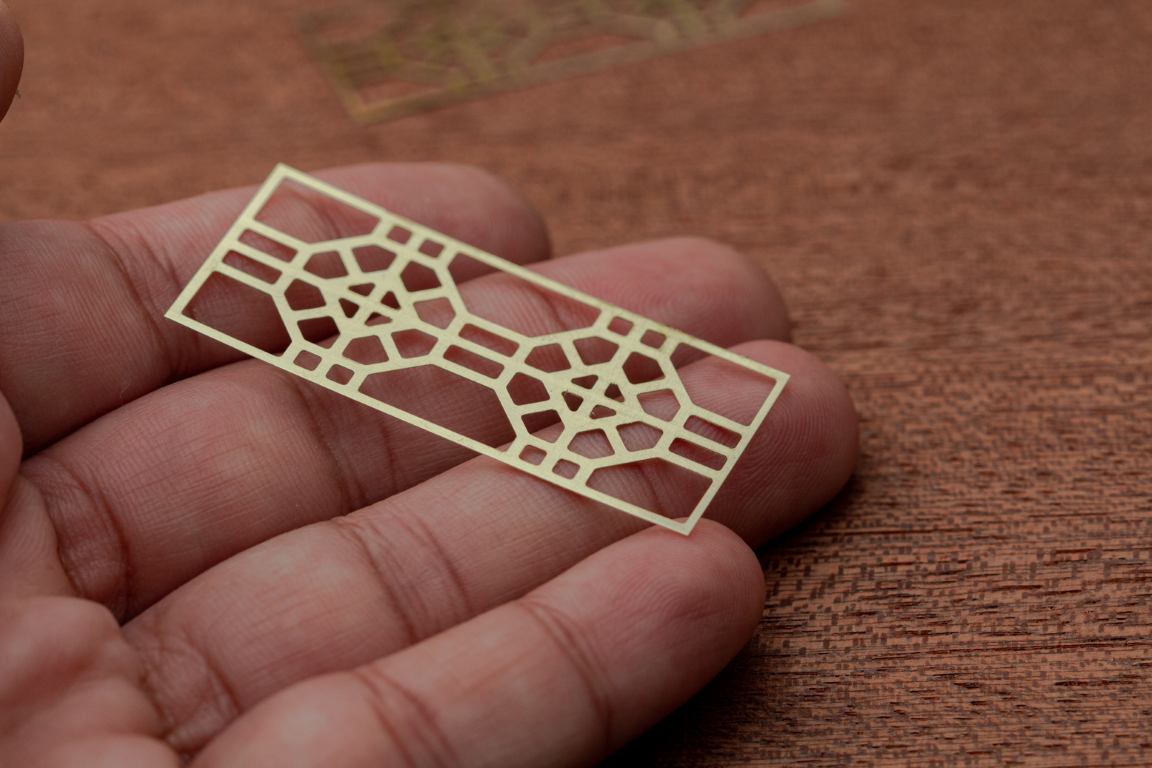
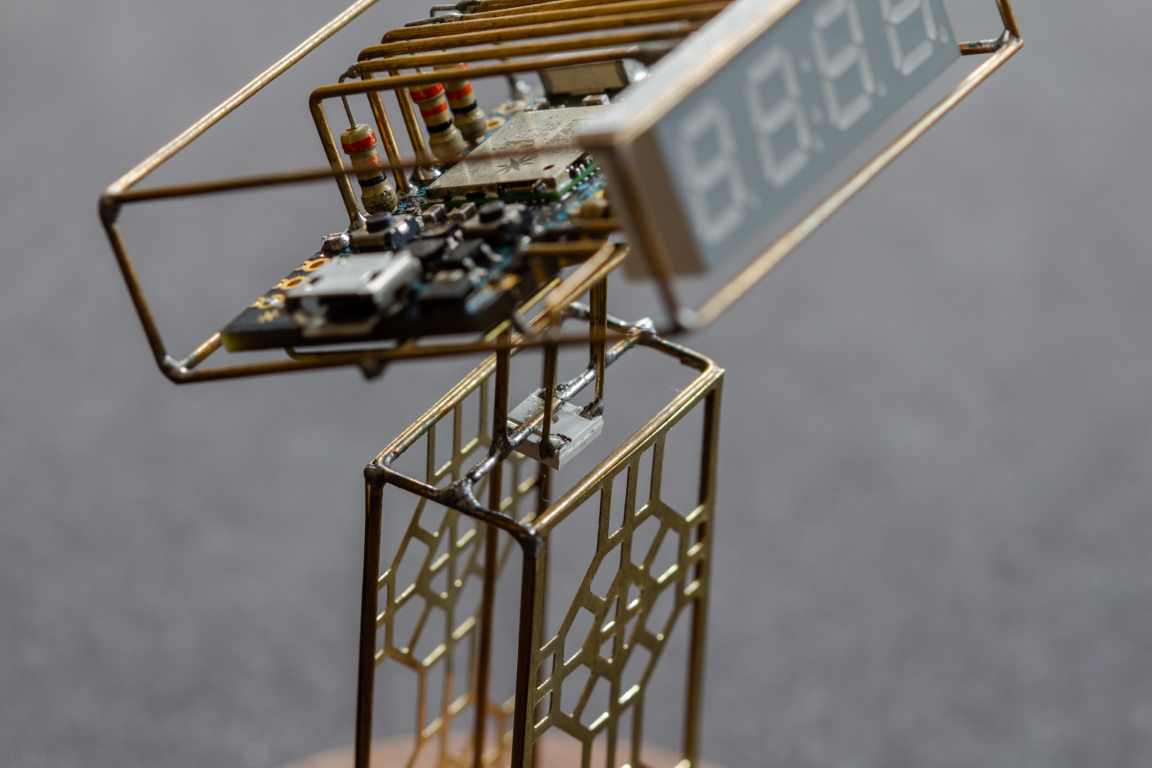
The interconnects are made with 0.8mm or 20AWG brass rods and the body is milled out of 0.01" brass sheet using the Bantam Tools desktop CNC machine.
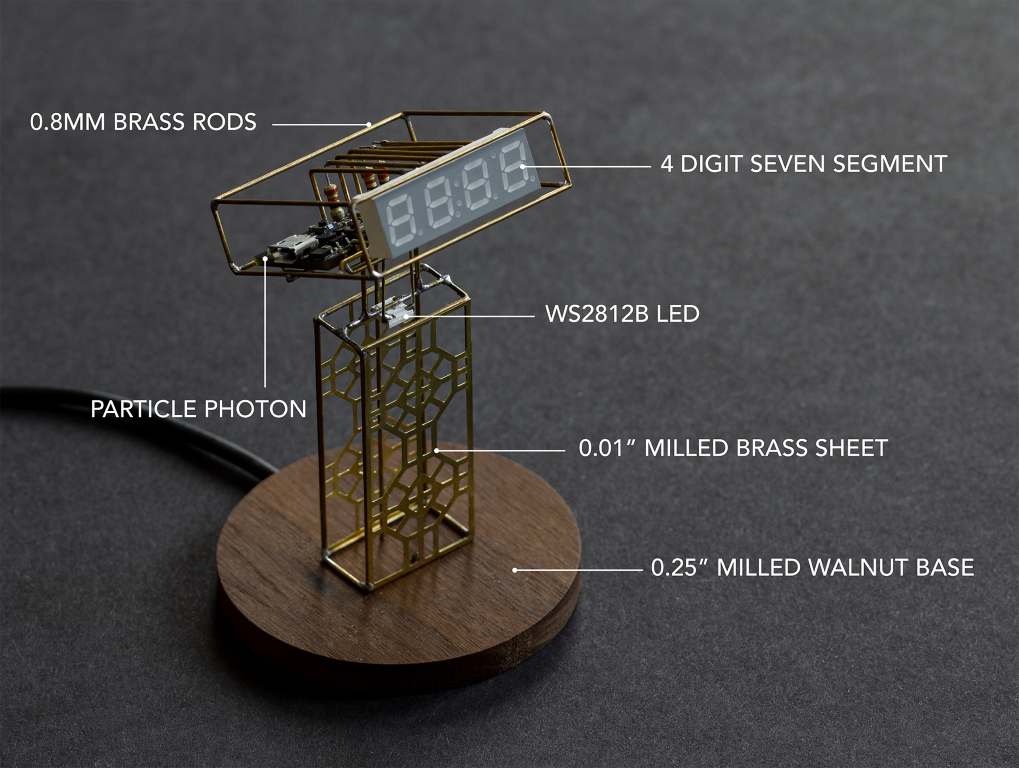
Milling the front and back grill out of a 0.01" brass sheet.
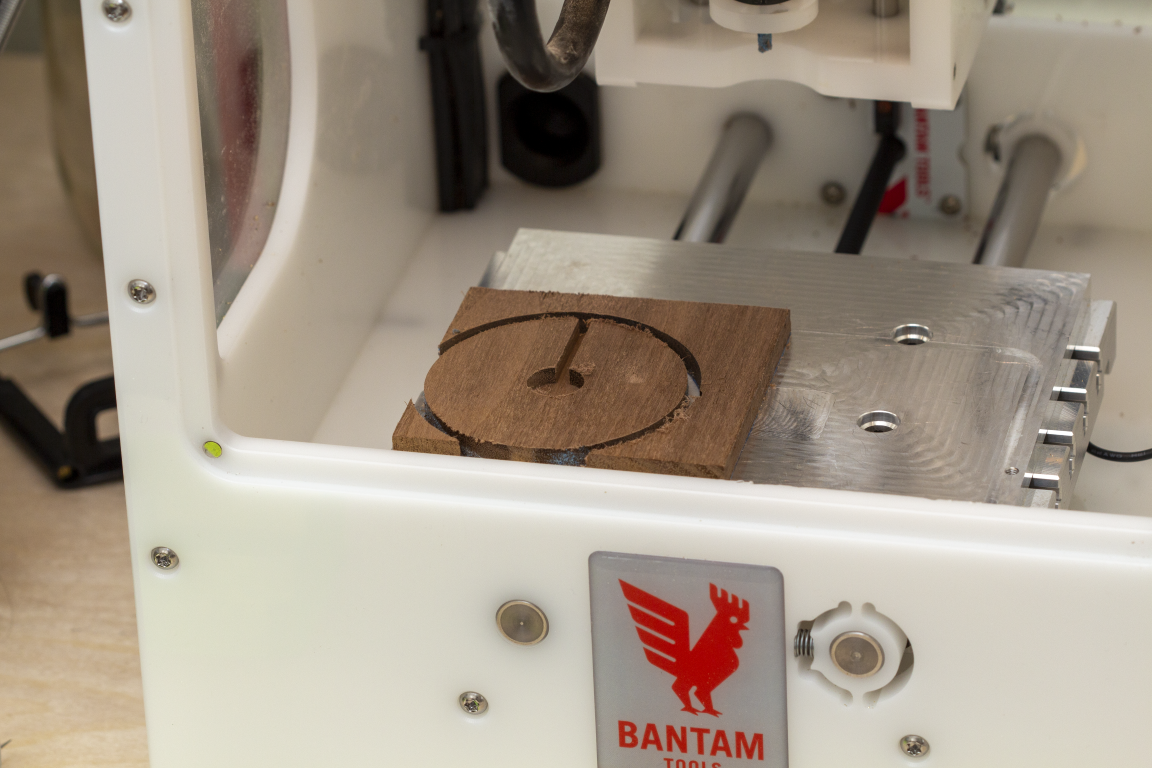
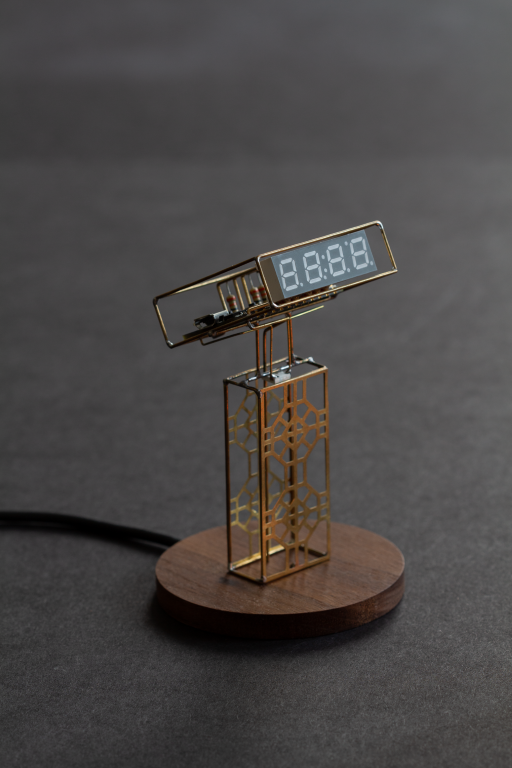
Milling the circular base out of a 0.25" walnut block.
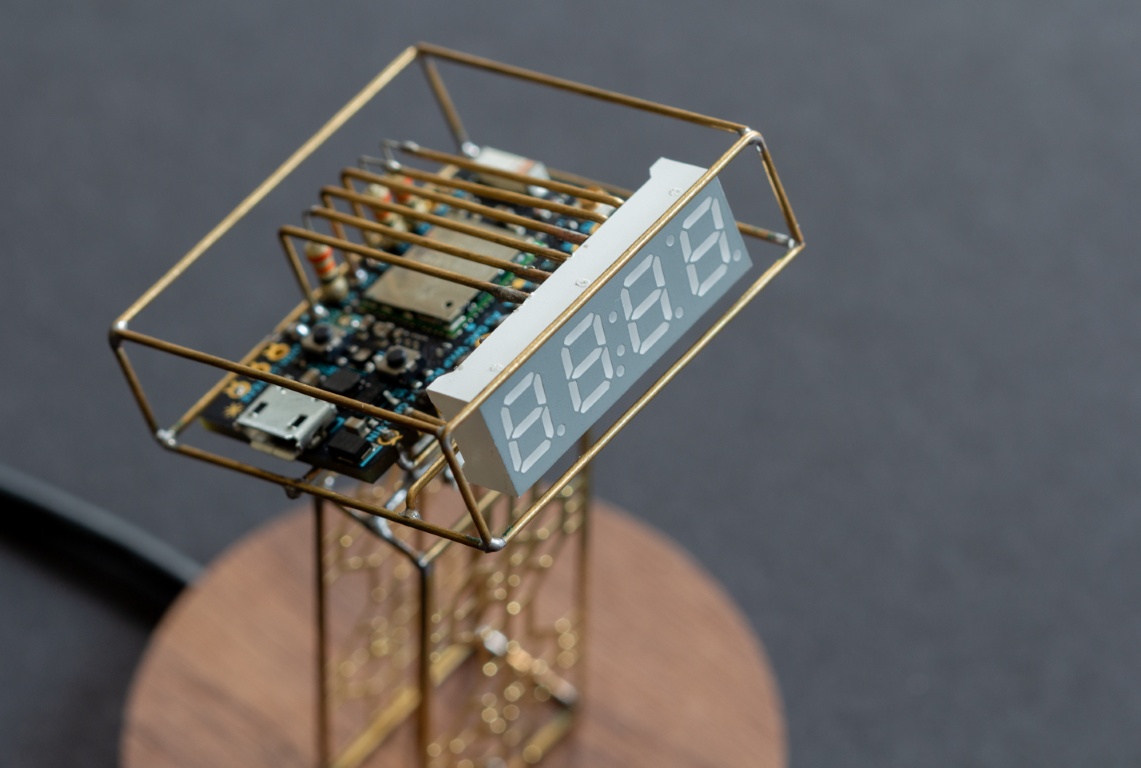
One WS2812B is soldered in the center just below Chintoo's neck.
The power (from a USB cable) is brought through the bottom center hole all the way up to the Photon's VIN pin while the GND is connected to its chassis.
Chintoo experiencing a zen moment.
Firmware
The firmware is based on the SevSeg library by Dean Reading. I created a collection of custom emoticons that try to convey different emotions.
I used the Adafruit Neopixel library to control the WS2812B RGB LED. This is completely optional, but adds a nice ambient light around the sculpture.
The complete code is available on GitHub here.
Resources
- SevSeg Library
https://github.com/DeanIsMe/SevSeg - Adafruit's Neopixel Library
https://github.com/adafruit/Adafruit_NeoPixel
Help and Support
I’ve created a Discord server dedicated to Circuit Sculpture, and it’s grown to over 1,000 members! It’s the perfect place to ask questions, share your projects, or just hang out with others who love building circuit sculptures and electronics.
While I can’t respond to individual emails, posting your questions or ideas on the Discord channel is the best way to get my attention.
Join the community → Circuit Sculptures
If you found this documentation useful, please consider supporting me on Patreon or buying me coffee! Thank you!