Cumin Lander
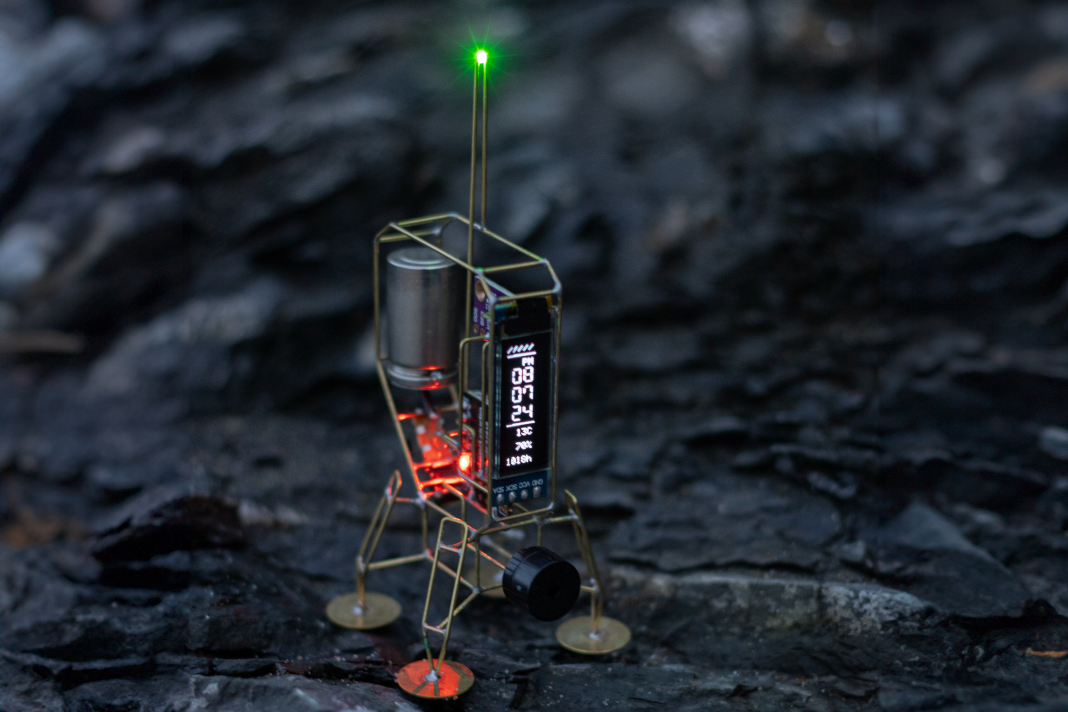
The Cumin Lander is a small planetary lander-inspired circuit sculpture that displays time, temperature, humidity, and pressure.
I had just finished building the BLE satellite sculpture and wanted to keep building with the Seeedstudio Xiao BLE dev board, designed around the nRF52840 BLE SoC. The form factor is very small (and hence the name, Xiao, which in Chinese means small/little!) and has a built-in regulator and a battery charger.
Instead of using a color IPS TFT display like my previous build, I decided to use a more simple and widely available monochrome 128x32 OLED display module. They only require a 3.3V power source and talk over I2C. I have previously used this display on my air quality measuring sculpture.
Parts List
- Seeed Studio’s XIAO nRF52840 dev board. (You don’t need the BLE Sense version for this build.)
- BME280 sensor breakout board
- 128x32 OLED display module
- 14250 Li-Ion battery
- 20 AWG brass or copper rods for the frame
- 14mm brass discs for landing pads
- SPDT power slide switch
- Buzzer (optional)
- Push button (optional)
- LED 0805 (optional)
Tools
- Soldering Iron (I recommend Pinecil, Hakko FX888D, or Weller)
- Solder (I don’t recommend lead-free solder for this project)
- Flux pen
- Flat needle nose pliers (these flat ones, or thin ones)
- Flush cutter from Xuron
- Steel wool for cleaning joints
- Printer for templates
(*Some links are Amazon affiliate links.)
Schematic
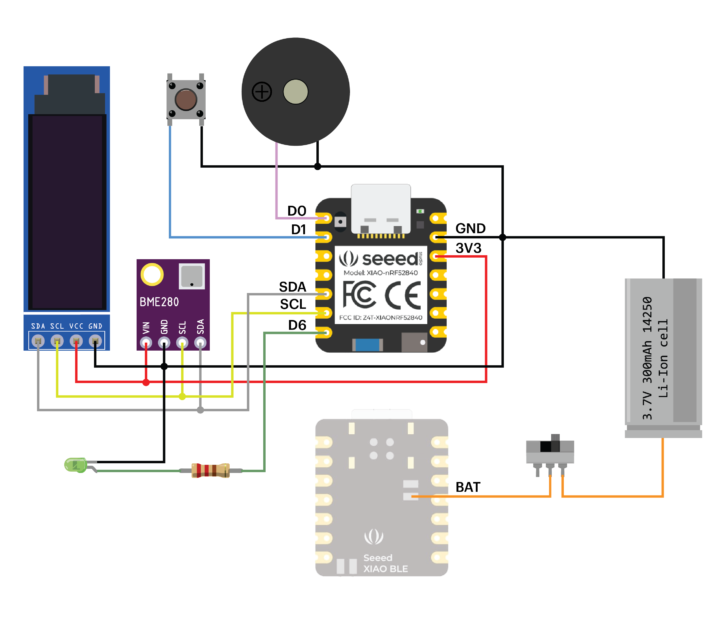
The OLED module and the BME280 sensor share the Xiao's I2C bus. No external pull-up resistors are needed since they are built into the display module. The buzzer is connected to D0 (PWM-capable). An LED is connected to D6 via a 220-ohm resistor. The push button (optional) connects D1 to GND with an internal pull-up.
Display
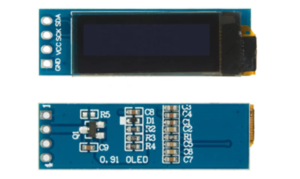
The monochrome OLED module (0.91", 128x32 pixels, SSD1306 controller) communicates via I2C and runs at 3.3V. For Arduino, I used the Adafruit SSD1306 library.
Sensor
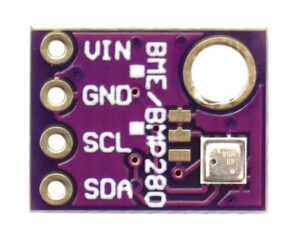
The BME280 sensor measures temperature, humidity, and pressure. Check if your board is configured for I2C (mine defaulted to SPI and needed a jumper mod).
Power
Use these batteries with extreme caution. Improper use can result in fire.
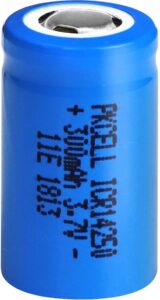
The lander is powered by a 3.7V 300mAh 14250 (½ AAA) Li-Ion cell. The Xiao BLE’s onboard charger handles USB charging. If you prefer, use USB power or a protected LiPo like this one.
Firmware
Source code is available on GitHub.
On bootup, the lander initializes the GPIOs, BLE radio, display, and sensor, plays a melody, and begins reading data from the BME280. It updates the display once per second.
You can set the time over Bluetooth using Adafruit's Bluefruit Connect app.
Construction
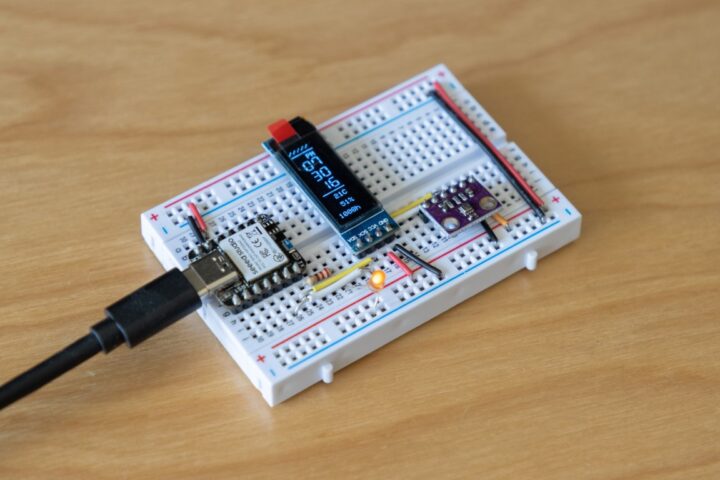
I tested and finalized the circuit on a breadboard. I had initially used the SHT31 sensor but then moved to the BME280, which measures temperature, humidity, and pressure. The OLED and the sensor communicate over I2C and operate at 3.3V, making the connections to the Xiao quite simple.
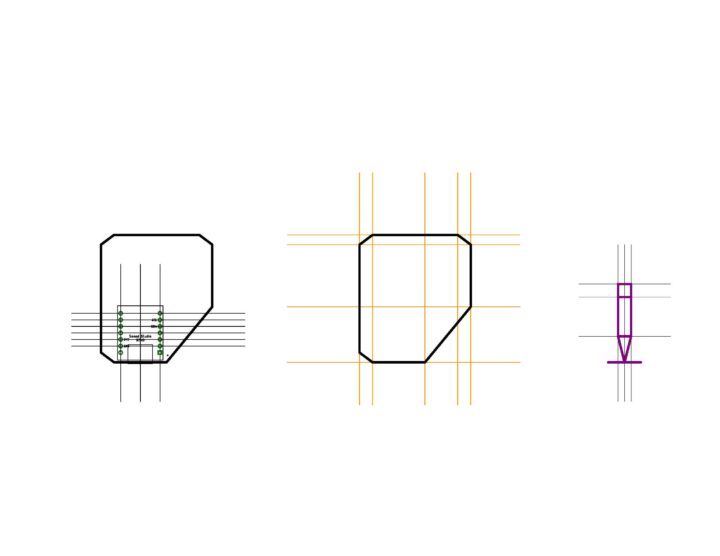
I designed a printable template in Eagle to help guide the soldering of the frame and the actual circuit. Like most of my sculptures, the entire frame is connected to GND, which makes routing the power very easy.
The early prototype was made from 20AWG copper wire. I later decided to use brass.
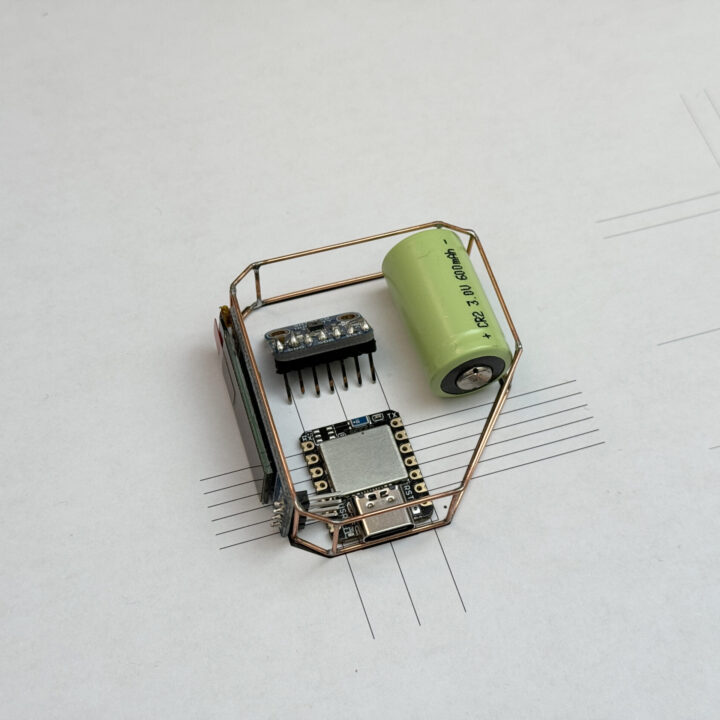
Testing the OLED and the sensor before adding the rest.

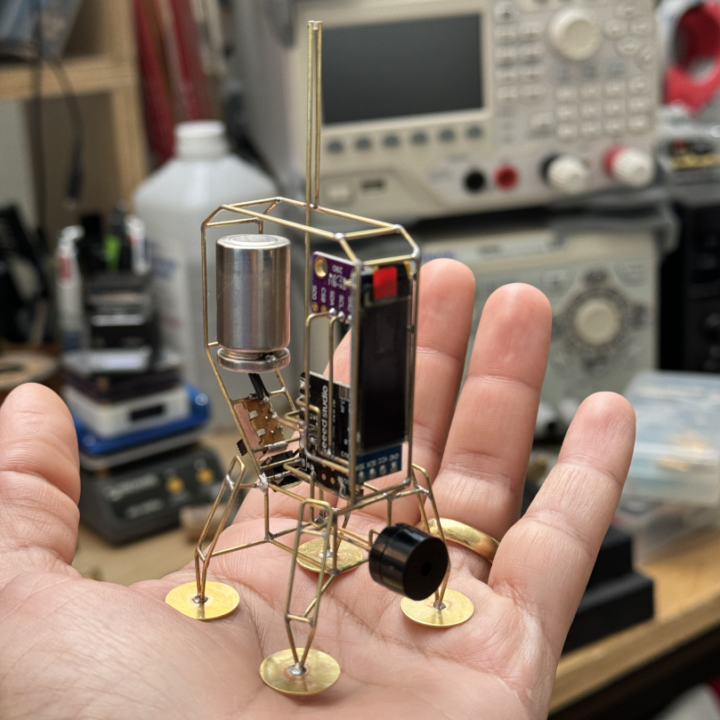
The construction of the legs is the same as my previous Boron Lander. The landing pads are small 14mm brass discs that I purchased from Etsy. You can also make your own by punching discs out of 0.5mm thick brass or copper sheet. Remember to solder the pads at the very end of the build. If you do so at the start, you might end up with a wobbly sculpture!
I forgot to take stills during the build process, but hopefully, this timelapse video gives a good idea.
If you found this documentation useful, please consider supporting me on Patreon or Ko-fi. Thank you!